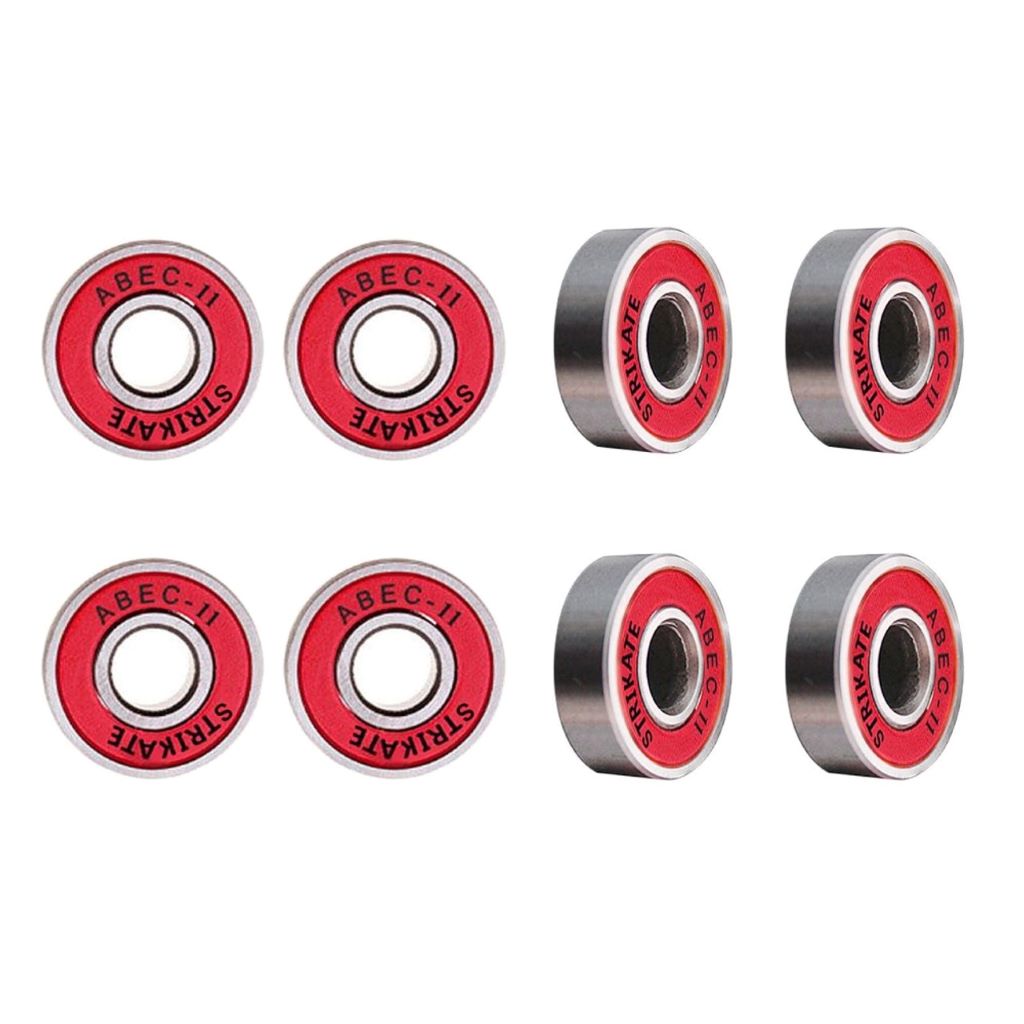
To clean skateboard bearings, soak them in a non-water-based cleaner such as acetone, isopropyl alcohol, or mineral spirits. These solvents will remove dirt and grime effectively.
Remember to use a clean bucket or bowl filled with the chosen cleaner to soak the bearings thoroughly.
Gather The Necessary Cleaning Tools
Before you start cleaning your skateboard bearings, make sure you gather all the necessary cleaning tools. Having the right tools at hand will ensure that the cleaning process is effective and efficient. Here are the tools you’ll need:
Acetone, Isopropyl Alcohol, Or Mineral Spirits
To remove dirt, grime, and old lubricant from your bearings, you’ll need a cleaning agent. Acetone, isopropyl alcohol, and mineral spirits are all popular choices for this task. These solvents effectively dissolve grease and dirt, leaving your bearings clean and ready for lubrication.
Clean Bucket Or Bowl
Having a clean bucket or bowl to soak your bearings in is essential. This container will hold the cleaning solution and allow you to fully submerge your bearings. Make sure to choose a container that is large enough to hold all your bearings comfortably.
Cleaning Brush Or Toothbrush
A cleaning brush or toothbrush is necessary to scrub away any stubborn dirt or grime from your bearings. Look for a brush with stiff bristles that can reach into the tight spaces of the bearings. This will ensure a thorough cleaning.
Bearing Cleaner Or Solvent
While acetone, isopropyl alcohol, and mineral spirits can work as solvents, using a specifically designed bearing cleaner can provide even better results. These cleaners are formulated to effectively dissolve dirt and grime without damaging the bearings. Look for a high-quality bearing cleaner for optimal cleaning performance.
Once you have gathered all the necessary cleaning tools, you are ready to proceed with the next steps of cleaning your skateboard bearings. Remember, regular cleaning and maintenance are crucial for optimal performance and longevity of your bearings. Now let’s move on to the next step: Removing the Bearings from the Wheels.

Credit: www.skiwax.eu
Remove Bearings From Skateboard Wheels
To clean skateboard bearings, start by removing them from the wheels. Then, soak the bearings in a non-water-based cleaner like acetone or isopropyl alcohol. This will help them to be deep-cleaned and ready for better performance on the skateboard.
To properly clean skateboard bearings, you’ll first need to remove them from the wheels. This ensures that you can clean each bearing thoroughly and remove any dirt, dust, or debris that may have accumulated over time. Following these steps will ensure a smooth and efficient removal process.
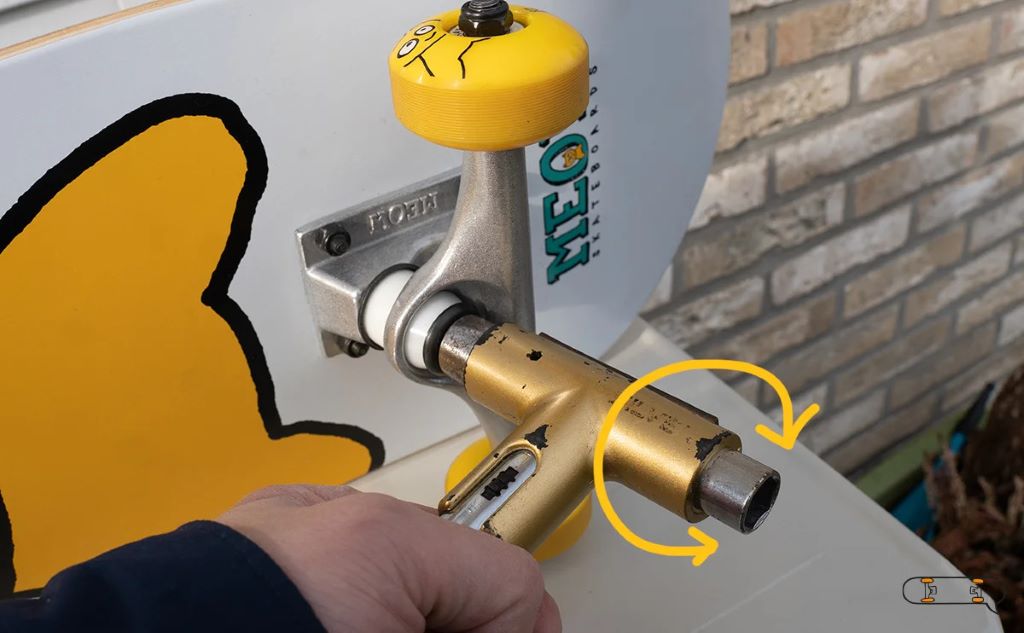
1. Use a skate tool or wrench to remove the wheels from the skateboard:
Using a skate tool or wrench, loosen the nuts or bolts holding the wheels in place on the skateboard. Unscrew each nut or bolt until the wheels are loose and can be easily removed. Be sure to set the nuts or bolts aside in a safe place to prevent them from getting lost.
2. Use a skate tool or bearing press to pop out the bearings from the wheels:
Once the wheels are removed, you can now focus on removing the bearings. There are two common methods for doing this – using a skate tool or a bearing press.
– If you’re using a skate tool, place it over the bearing and apply pressure to pop it out of the wheel. Repeat this process for each bearing until all are removed.
– If you have a bearing press, position the tool over the bearing and press down firmly to release it from the wheel. Again, repeat this step for each bearing until they are all free.
Regardless of which method you choose, it’s essential to be cautious to avoid damaging the bearings or the wheels during the removal process.
3. Clean the bearings separately:
Once you’ve successfully removed the bearings from the wheels, it’s time to give them a deep clean. This will help ensure their optimal performance and longevity. Clean each bearing individually by following the appropriate cleaning method, such as using a solvent or cleaner that is suitable for skateboard bearings. Acetone, isopropyl alcohol, and mineral spirits are all effective options for cleaning skateboard bearings.
Remember, properly removing the bearings from the wheels is a crucial first step in the cleaning process. By taking the time to remove them correctly, you’ll have better access to clean each bearing thoroughly and maintain their performance for a smoother ride.
Disassemble The Bearings
Once you have removed the bearings and bearing shields from your wheels, it is time to disassemble them for a deep clean. Follow the steps below to ensure a thorough disassembly:
Remove The Bearing Shields Using A Small Flathead Screwdriver
Begin by locating the bearing shields on each side of the bearing. These shields may be made of plastic or metal and are designed to protect the inner workings of the bearing. To remove them, you will need a small flathead screwdriver.
- Place the skateboard wheel on a stable surface, with the bearing facing upwards.
- Insert the flathead screwdriver under the edge of the bearing shield.
- Gently pry the shield upwards to loosen it from the bearing.
- Repeat the above steps for each bearing shield.
Place The Bearing Shields In A Safe Place For Reassembly Later
Now that you have successfully removed the bearing shields, it is important to keep them safe. This will ensure easy reassembly once the cleaning process is complete.
Follow these steps to keep the bearing shields organized:
- Find a small container or tray where you can safely store the bearing shields.
- Label the container or tray to avoid any confusion when reassembling the bearings.
- Place each bearing shield in the designated spot on the container or tray.
- Store the container or tray in a secure location where it won’t be accidentally knocked over or misplaced.
By disassembling the bearings and safely storing the bearing shields, you are now ready to move on to the next step of the cleaning process. Cleaning your skateboard bearings regularly will ensure optimal performance and a smoother ride.
Soak Bearings In Cleaner
To clean skateboard bearings, start by removing them from the wheels and taking off the bearing shields. Then, soak the bearings in a non-water-based cleaner like acetone, isopropyl alcohol, or mineral spirits. This will help to deep clean and maintain the durability and speed of your bearings.
Once you have removed the bearings and bearing shields from your wheels, it’s time to give them a deep clean. To do so, you’ll need a cleaner or solvent that is not water-based. Acetone, isopropyl alcohol, and mineral spirits are all good options for this task.
Fill A Clean Bucket Or Bowl With The Chosen Cleaner Or Solvent (acetone, Isopropyl Alcohol, Mineral Spirits)
To begin the cleaning process, gather a clean bucket or bowl and fill it with your chosen cleaner or solvent. Ensure that the container is free from any dirt or debris that could contaminate the cleaning solution. Acetone, isopropyl alcohol, or mineral spirits are effective choices for this step.
Place The Bearings Into The Cleaner, Ensuring They Are Fully Submerged
Once you have prepared the cleaning solution, carefully place the skateboard bearings into the container, ensuring that they are fully submerged. This is essential to ensure that the cleaner can effectively penetrate and loosen any dirt and debris.
Let The Bearings Soak For At Least 10-15 Minutes To Loosen Dirt And Debris
Allow the bearings to soak in the cleaner for a minimum of 10-15 minutes. This soaking time will help to loosen any dirt and debris that may have accumulated within the bearings. It is crucial to be patient during this step to ensure a thorough cleaning.
Make sure to follow these steps to properly soak your skateboard bearings in cleaner. This process will help remove dirt and debris, ensuring that your bearings perform at their best. Remember, a deep clean should be done every few months depending on your skating environment. So, take the time to give your bearings the care they deserve for optimal performance on your skateboard.
Clean The Bearings
To clean skateboard bearings, start by removing the bearings and bearing shields from the wheels. Then, soak them in a cleaner or solvent like acetone, isopropyl alcohol, or mineral spirits. This will help give them a deep clean and improve their performance.
Remove One Bearing At A Time From The Cleaner
When it comes to cleaning your skateboard bearings, it’s important to take it one step at a time. Start by removing one bearing at a time from the cleaner or solvent. This will allow you to focus your attention on each individual bearing and ensure a thorough clean.
Scrub Away Dirt And Grime With A Cleaning Brush Or Toothbrush
Once you have removed the bearing from the cleaner, it’s time to get scrubbing. Take a cleaning brush or toothbrush and use it to scrub away any dirt and grime that may have accumulated on the bearing. Pay special attention to the inner and outer race of the bearing, as these are the areas that tend to collect the most debris.
Rinse The Bearing With Clean Water
After scrubbing away the dirt and grime, it’s important to rinse the bearing with clean water. This will remove any remaining cleaner or solvent and ensure that your bearings are left squeaky clean. Make sure to rinse each bearing thoroughly, ensuring that all traces of cleaner are washed away.
- Remove one bearing at a time from the cleaner
- Scrub away dirt and grime with a cleaning brush or toothbrush
- Rinse the bearing with clean water
By following these steps, you can ensure that your skateboard bearings are thoroughly cleaned and ready to roll. Remember to clean your bearings regularly to maintain optimal performance and longevity.
Dry And Reassemble The Bearings
After thoroughly cleaning your skateboard bearings and allowing them to air dry, it’s time to dry them completely and reassemble them. This step is crucial in ensuring your bearings function smoothly and provide you with a fast and enjoyable ride. Below, we’ll guide you through the process of drying the bearings and reassembling them to get your skateboard ready for action.
Use A Clean Towel Or Paper Towel To Dry The Bearings Thoroughly
Once the bearings have air-dried, take a clean towel or paper towel to dry each bearing individually. Remove any moisture or residue from the bearings by gently wiping them. Make sure to be thorough and pay attention to any hard-to-reach areas.
Reassemble The Bearing Shields Onto The Bearings, Making Sure They Are Secured Properly
After the bearings have been dried, it’s time to reassemble the bearing shields. Place each bearing shield back onto its respective bearing, ensuring they fit snugly. It’s important to secure the shields properly to prevent any dirt or debris from entering the bearings.
To reassemble the bearing shields, follow these steps:
- Carefully align the bearing shield with the bearing.
- Gently press down on the shield until it snaps into place.
- Repeat this process for each bearing.
Lubricate The Bearings
To clean skateboard bearings, start by soaking them in a non-water-based cleaner like acetone or isopropyl alcohol. This will help remove dirt and grime. Once they are clean, make sure to lubricate the bearings for optimal performance. Regular cleaning and lubrication can extend the lifespan of your skateboard bearings.
Apply A Few Drops Of Skateboard Bearing Oil Or Lubricant Onto Each Bearing
To ensure that your skateboard bearings stay smooth and efficient, it’s important to lubricate them regularly. One of the easiest ways to do this is by applying a few drops of skateboard bearing oil or lubricant onto each bearing. This will help to reduce friction and keep the bearings running smoothly. Ensure you use a high-quality oil or lubricant specifically designed for skateboard bearings.
Spin The Bearings To Distribute The Lubricant Evenly
Once you’ve applied the oil or lubricant onto each bearing, it’s time to distribute it evenly. To do this, simply spin the bearings with your fingers. This will help to spread the lubricant throughout the bearing, ensuring that all moving parts are properly coated. Spinning the bearings also helps to remove any excess oil or lubricant that may have been applied.
Remember, it’s important to not over-lubricate the bearings as this can lead to excessive friction and a decrease in performance. A few drops of oil or lubricant is all you need to keep your skateboard bearings in top condition.
Summary
In order to keep your skateboard bearings running smoothly, it’s essential to lubricate them regularly. To do this, apply a few drops of skateboard bearing oil or lubricant onto each bearing. After applying the oil, spin the bearings to distribute the lubricant evenly and remove any excess. By following these simple steps, you can ensure that your skateboard bearings are always performing at their best.
Reinstall The Bearings Onto Skateboard Wheels
To clean skateboard bearings, start by removing them from the wheels and removing the bearing shields. Soak the bearings in a non-water-based cleaner like acetone, isopropyl alcohol, or mineral spirits. After a deep clean, you can lubricate the bearings and reinstall them onto the skateboard wheels for smooth performance.
After successfully cleaning your skateboard bearings, it’s time to reassemble them onto your skateboard wheels. This step is crucial to ensure a smooth and efficient ride. Here’s how you can do it:
Place each bearing back into the wheels, ensuring they are fully seated.
1. Start by taking one bearing and aligning it with the hole in the wheel. Make sure the bearing is facing the correct way – the shielded side should be facing outwards.
2. Gently press down on the center of the bearing until it sits snugly into the wheel.
3. Repeat this process for the remaining bearings, making sure each one is fully seated in its respective hole.
Use A Bearing Press Or Skate Tool To Press The Bearings Back Into The Wheels
If you have a bearing press or a skate tool, it is highly recommended to use them for this step. These tools will help ensure that the bearings are securely pressed into the wheels. Here’s how you can use them:
1. Place the wheel on a flat surface with the bearing hole facing upwards.
2. Take the bearing press or skate tool and position it on top of the bearing. Make sure it covers the entire bearing surface.
3. Apply even pressure to the tool, pressing down until the bearing is fully inserted into the wheel.
4. Repeat this process for the remaining bearings, ensuring each one is properly pressed into the wheel.
If you don’t have a bearing press or skate tool, you can use the axle of your skateboard truck as an alternative. Place the wheel on the axle and gently press down until the bearing is fully seated.
By following these steps, you’ll have your skateboard bearings reinstalled onto your wheels, ready for your next ride. Remember, proper maintenance of your bearings not only extends their lifespan but also ensures a smoother and more enjoyable skateboarding experience.
Test The Bearings
To clean skateboard bearings, start by removing them from the wheels and bearing shields. Then, soak the bearings in a non-water-based cleaner or solvent such as acetone, isopropyl alcohol, or mineral spirits. Once they are clean, dry them thoroughly before reassembling them.
Remember, it’s important to clean your bearings every two to three months, depending on your skating environment.
Once you have completed the cleaning process for your skateboard bearings, it’s important to test them to ensure they are in good working condition. Testing the bearings will help you identify any issues or areas that may still require cleaning or maintenance. To test your bearings, follow these steps:
1. Spin each wheel:
Spin each wheel individually and observe how smoothly and freely it rotates. A properly cleaned bearing should spin effortlessly. Listen for any unusual noises or grinding sensations, as this could indicate the presence of dirt or debris that needs further cleaning.
2. Check for smooth rotation:
As you spin each wheel, pay attention to its rotation. It should spin smoothly and without any resistance. If you feel any roughness or hear grinding sounds, it’s a sign that the bearing may still need some cleaning.
3. Inspect for wobbling or uneven rotation:
Watch the rotation of each wheel closely. If you notice any wobbling or uneven rotation, it could indicate an issue with the bearing. This could be due to dirt or debris lodged in the bearing or even a damaged bearing.
4. Repeat the cleaning process if necessary:
If any of the bearings show signs of issues during the testing process, it’s important to repeat the cleaning process for those specific bearings. This will ensure that they are thoroughly cleaned and ready for optimal performance. Use the same cleaning solution and methods mentioned earlier to clean the problematic bearings.
By testing your skateboard bearings after cleaning them, you can ensure that they are in top condition for an optimal riding experience. Identifying any issues during the testing process allows you to address them promptly, preventing any potential damage or decreased performance. Remember, regular maintenance and cleaning of skateboard bearings contribute to their longevity and overall performance.
Frequently Asked Questions For How To Clean Skateboard Bearings
How Often Should You Clean Skateboard Bearings?
Skateboard bearings should be cleaned every two to three months, depending on the skating environment. If you skate indoors frequently but the surface isn’t cleaned often, clean them once a month. Use acetone or rubbing alcohol for cleaning, as vinegar or citrus-based cleaners can leave residue.
Can You Clean Skateboard Bearings With Vinegar?
Yes, you can clean skateboard bearings with vinegar, but experts do not recommend it. Acetone or rubbing alcohol are better options as they leave no residue on the bearings. Vinegar may leave a thin residue, which can attract dust.
How Often Should I Clean My Skateboard Bearings?
Remember, bearings only need to be cleaned about once every two to three months depending on the environment you are skating in. If you primarily skate inside several times a month but the surface is not cleaned often, you might have to shine up your bearings once a month.
Can You Clean Skateboard Bearings With Vinegar?
Yes, technically you can use Acetone or some type of rubbing alcohol since they don’t leave any trace or film on the bearings. Vinegar or citrus-based cleaners can leave a thin trace on the bearings which can give dust a place to settle.
Conclusion
To ensure optimal performance and longevity of your skateboard bearings, regular cleaning is essential. Once you have removed the bearings and bearing shields, a deep clean is in order. Acetone, isopropyl alcohol, or mineral spirits will be effective solvents for this task.
Soak your bearings in the chosen cleaner to remove any dirt or debris. Remember, proper maintenance is key to a smooth and enjoyable ride. Happy skating!


